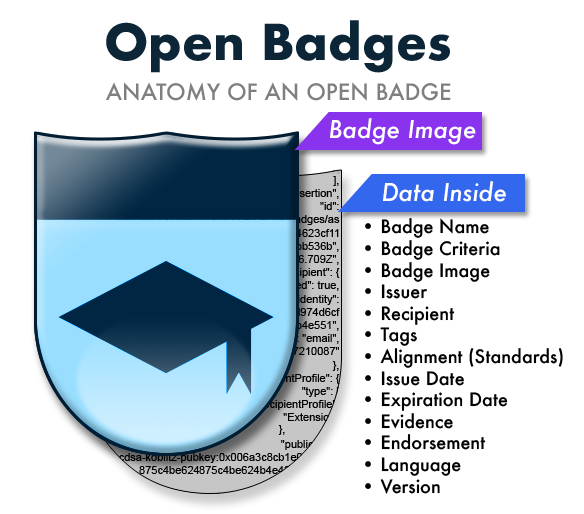
Figure 1 – Anatomy of an Open Badge
"Open Badges are verifiable, portable digital badges with embedded metadata about skills and achievements. They comply with the Open Badges Specification and are shareable across the web.
Each Open Badge is associated with an image and information about the badge, its recipient, the issuer, and any supporting evidence.
All this information may be packaged within a badge image file that can be displayed via online CVs and social networks.
Thousands of organizations across the world issue badges in accordance with the Open Badges
Specification, from non-profits to major employers to educational institutions at all levels."
- openbadges.org
For more details visit the Open Badges website.
Badge recipients will be able to login to our website and view their IoC badge portfolio. Here they can view the details of any of their badges in our friendly viewer page (see figure 5) and download their badges:
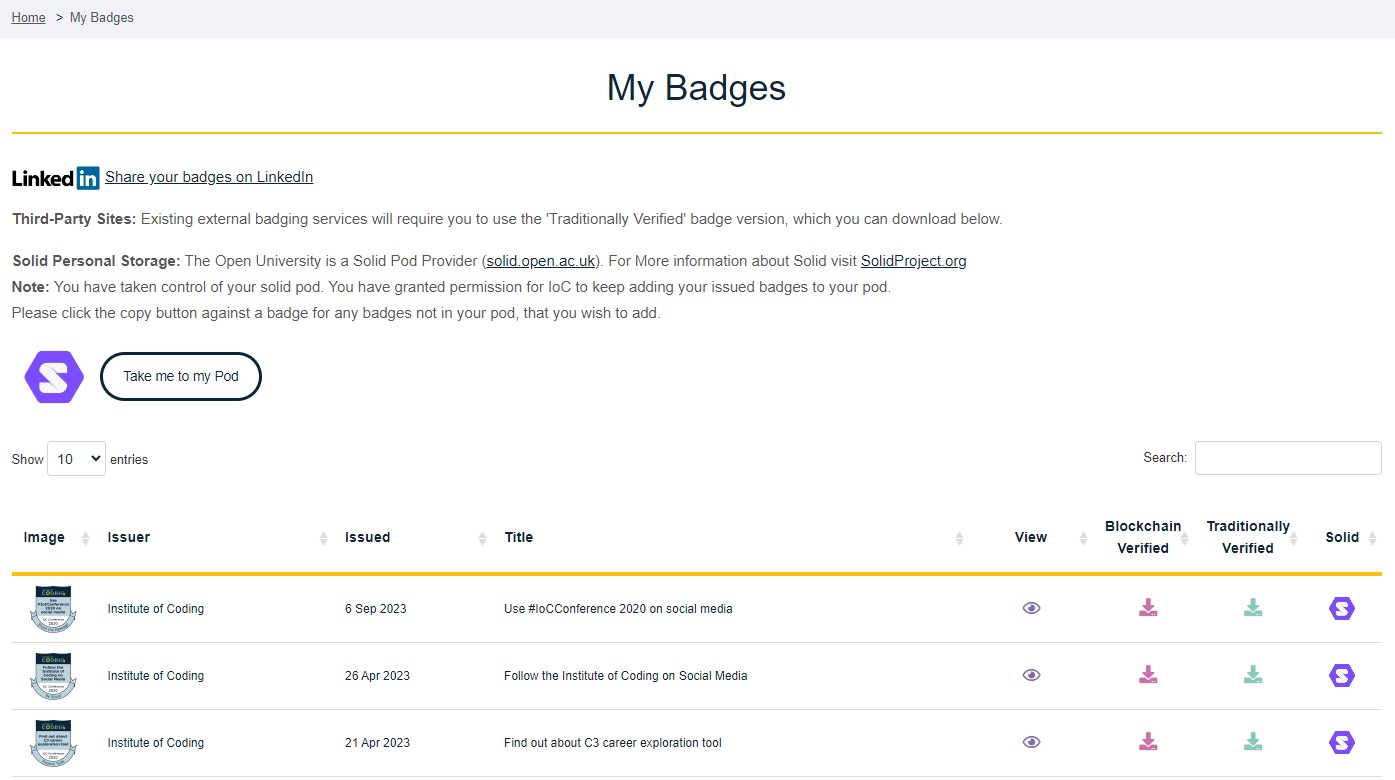
Figure 2 – Main section of the Badge Recipient homepage
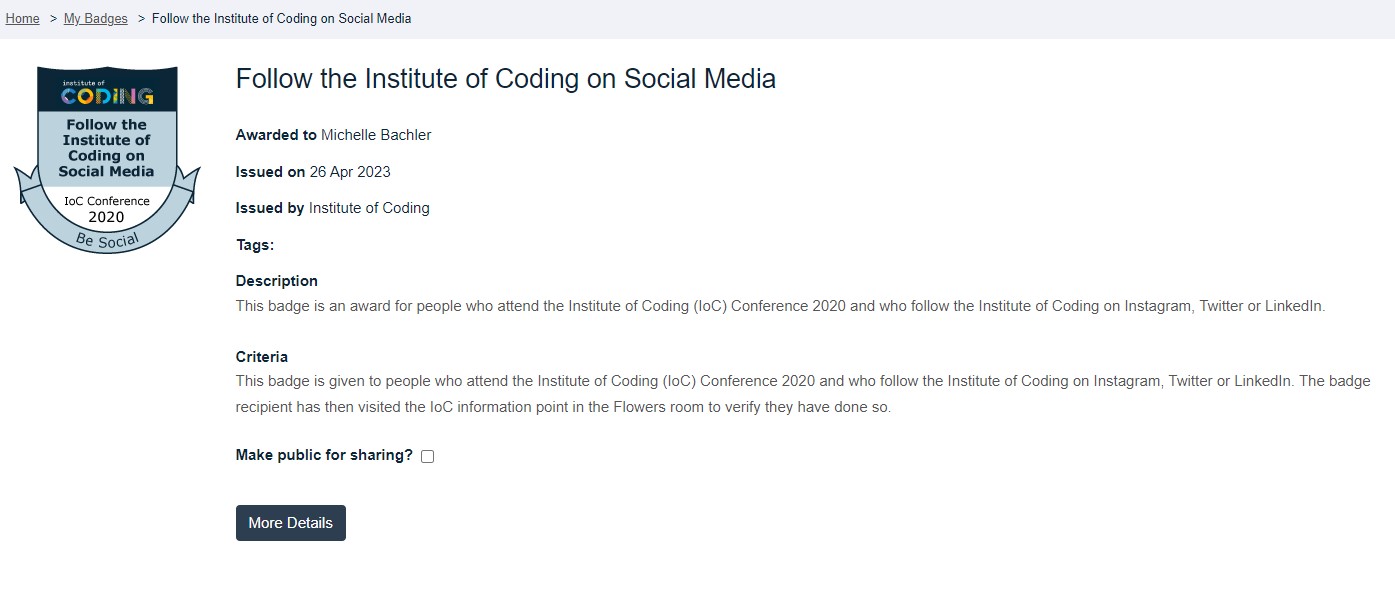
Figure 3 – Badge View page with example data
We have created a web page where anyone can come and validate one of our IoC badges. So if you have received a badge you can give it to, say a prospective employer, and they can come to our site and validate that it is a valid IoC badge that was issued to you. They must have access to the badge file and they must have separately obtained and confirmed the email address used for the recipient of the badge belongs to you.
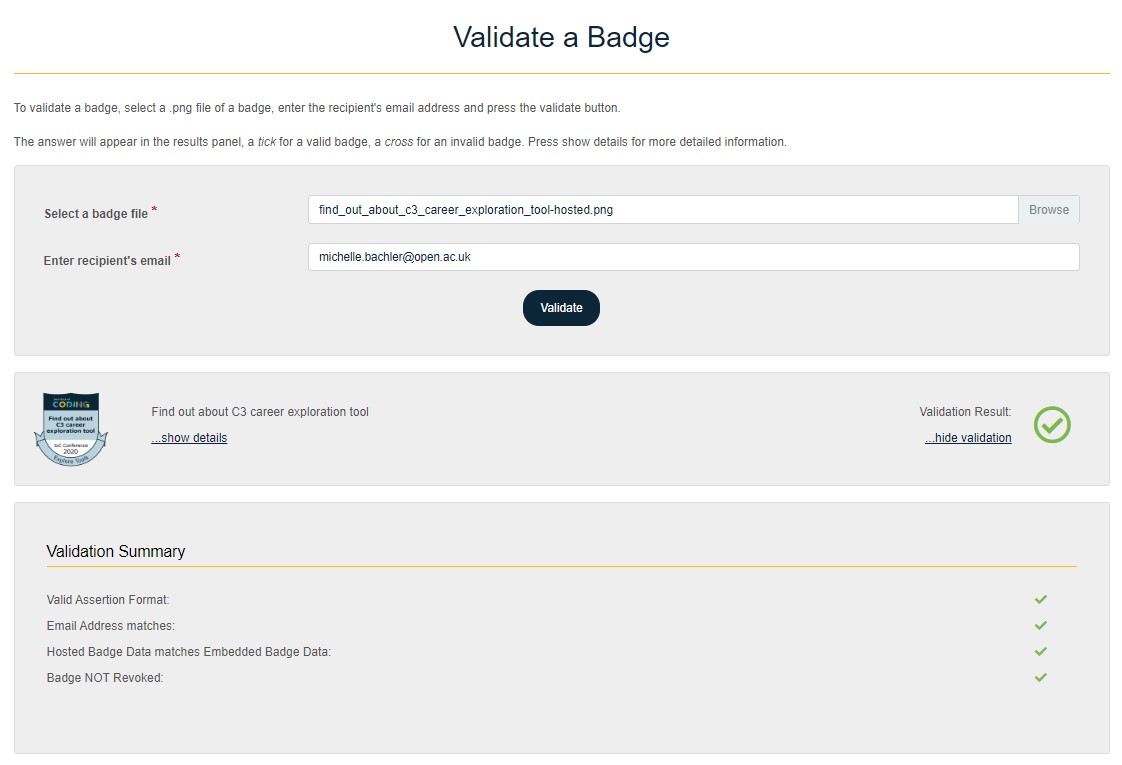
Figure 4 – IoC Validation webpage
There are many Open Badge services in existence for issuing, storing and sharing Open Badges which you could explore and engage with. But the most common use for your badges will be to share them on social media, especially somewhere like LinkedIn.
So in this section we will explain how you can share you Institute of Coding badges on LinkedIn.
- Go to your badge portfolio and click the view icon against the badge you want to share.
- Make the badge publically viewable by ticking the 'Make public for sharing' checkbox.
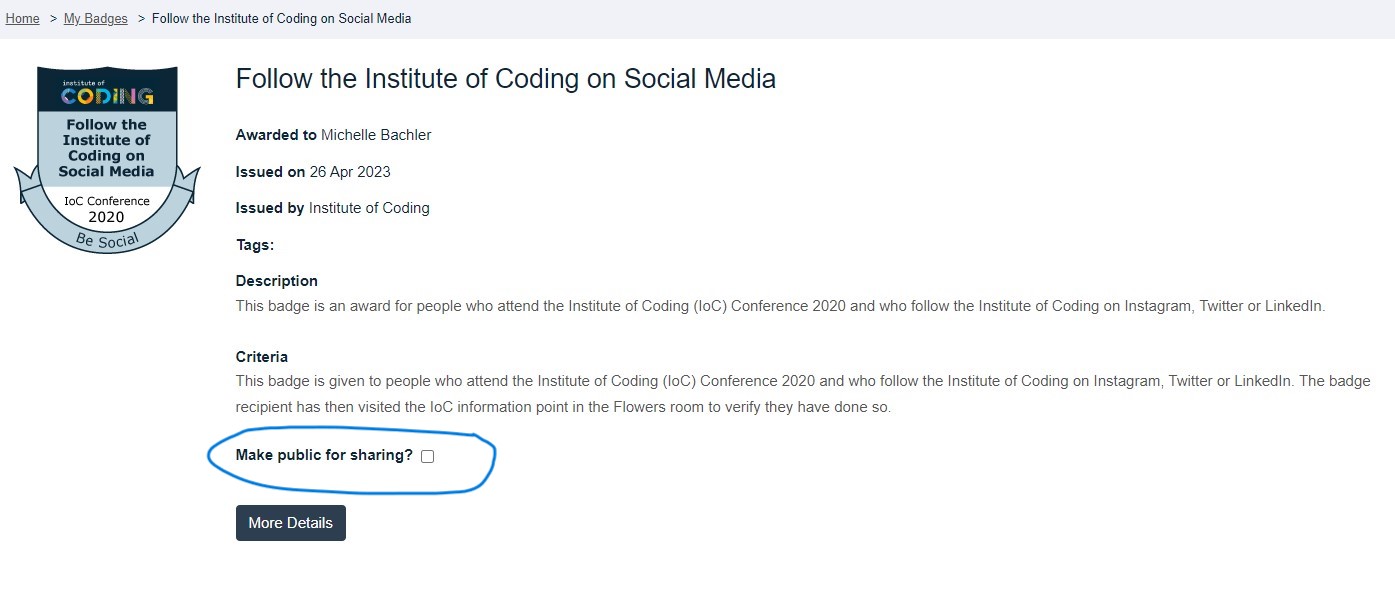
Figure 6 – An example of a Recipient Badge View page.
This will then display the public url for your badge. The url will only show your badge data if you have ticked that you want to share it. Otherwise people using the URL will not see your badge data.
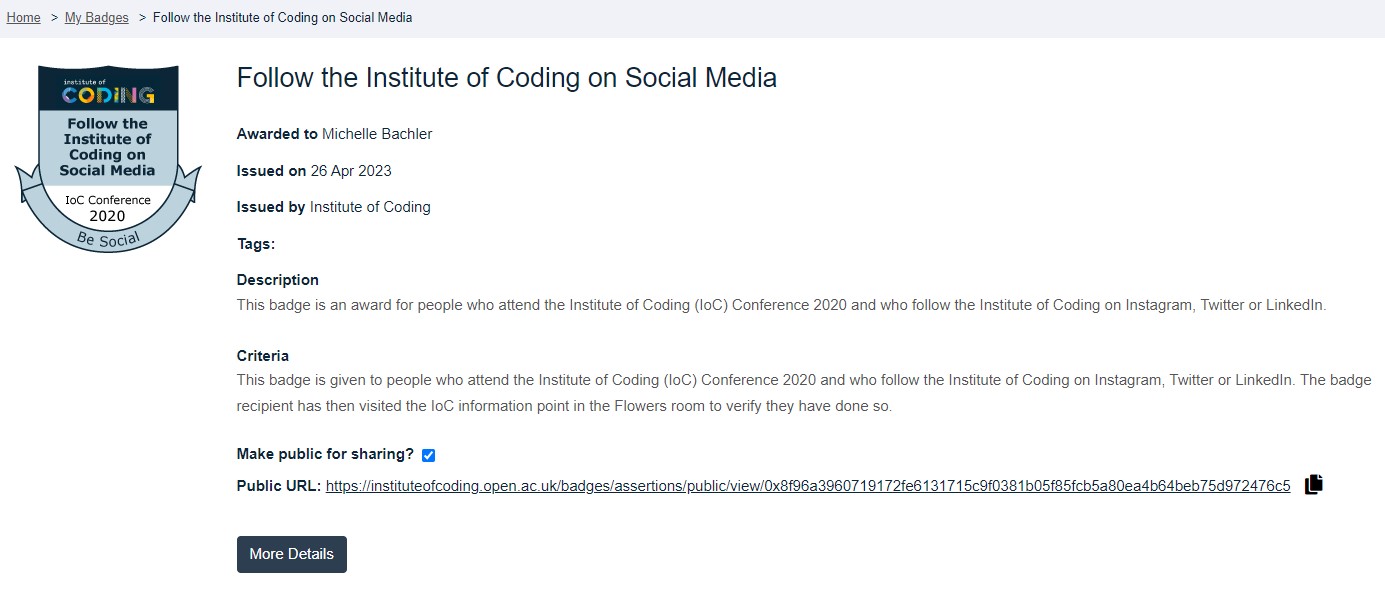
Figure 7 – An example of a Recipient Badge View page, with badge sharing on.
- Copy the Public URL using the copy button at the end.
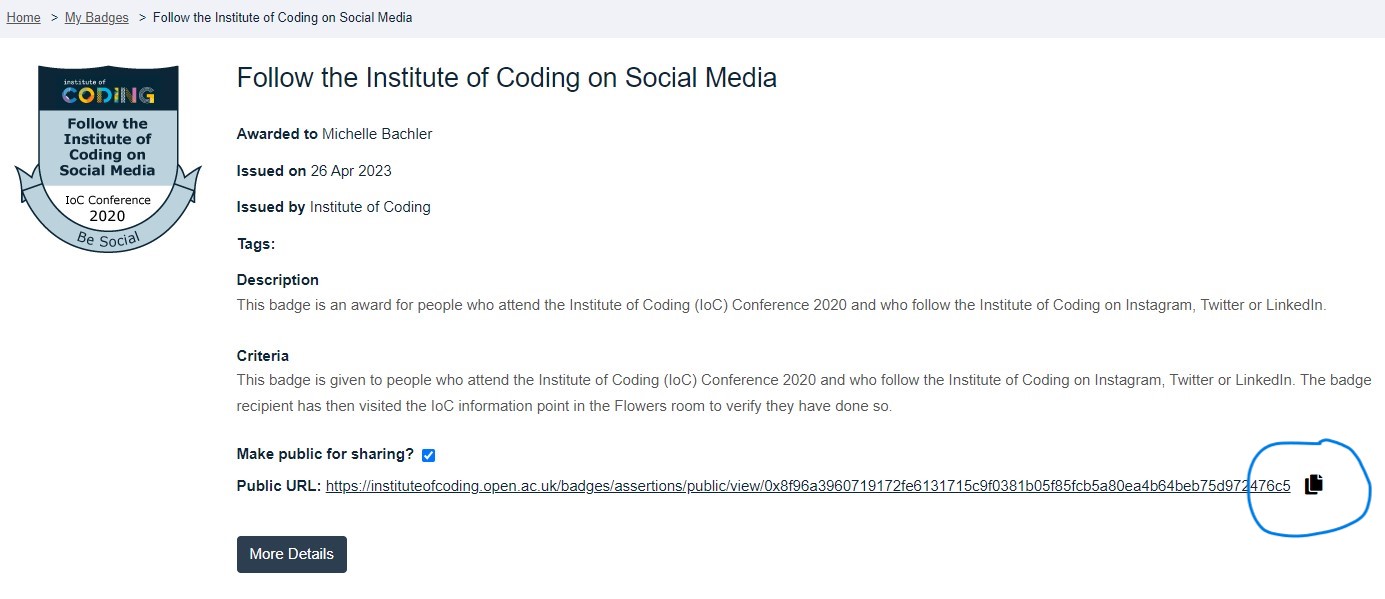
Figure 8 – An example of a Recipient Badge View page, with copy button circled.
- Log into LinkedIn
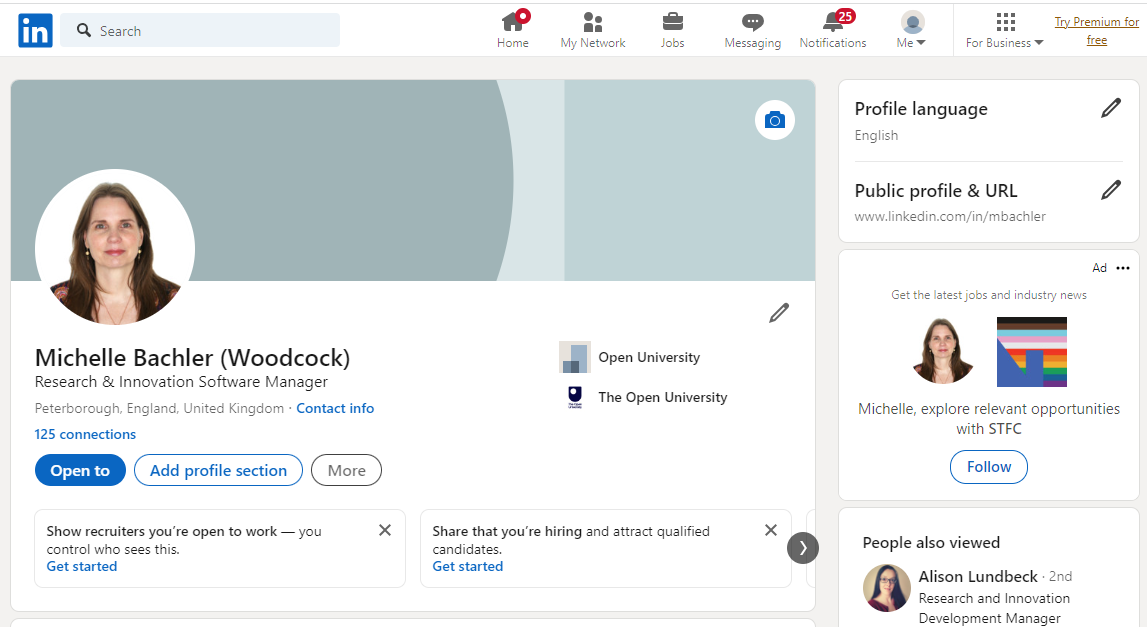
Figure 9 – An example of a LinkedIn profile page.
- Select 'Add profile section'
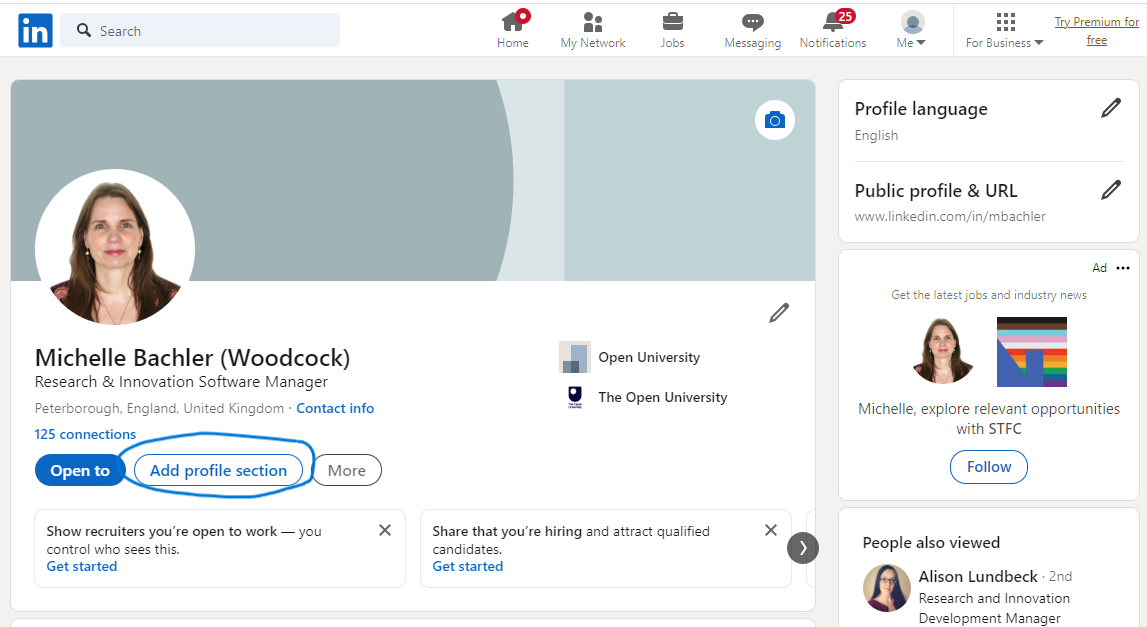
Figure 10 – An example of a LinkedIn profile page with button circled.
- Expand the 'Recommended' section on the popup and select 'Add licenses & certifications'
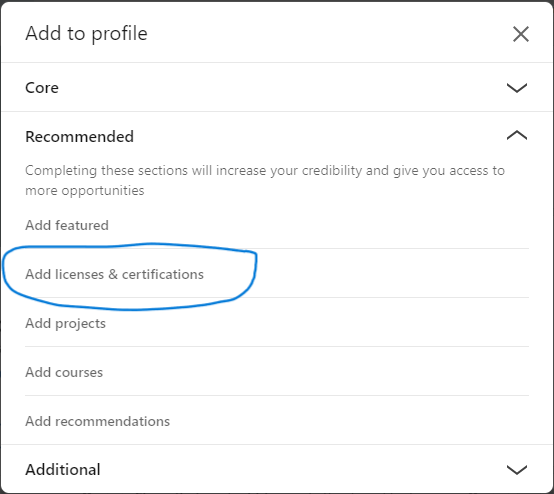
Figure 11 – An example of a LinkedIn popup with option selected.
- Complete the 'Add license or certification' form.
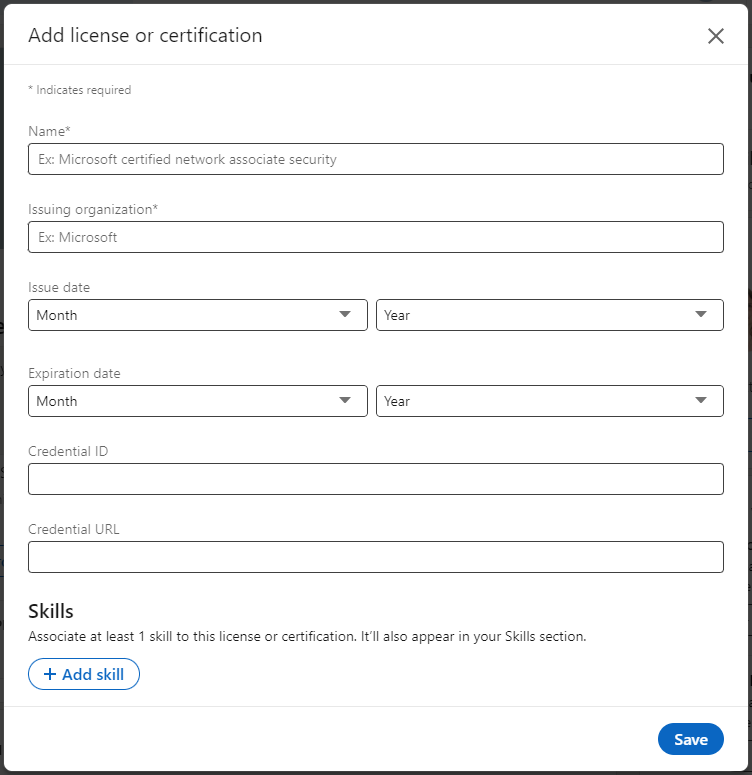
Figure 12 – An example of a LinkedIn Add license or certification form.
Paste the link you copied from your badge view page into the 'Credential URL' at the bottom of the form.
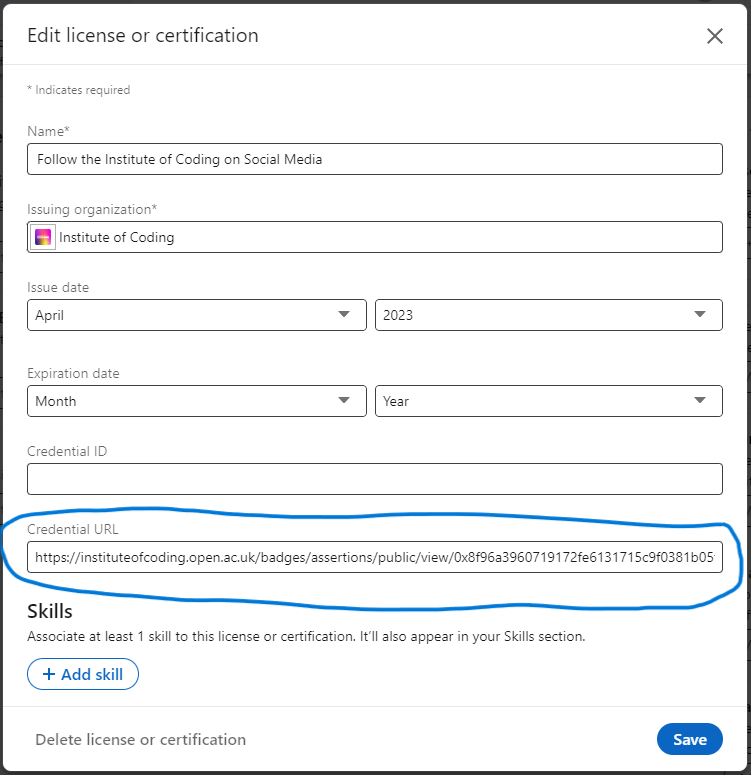
Figure 12 – An example of a LinkedIn Add license or certification form with credential ID circled.
You can get the badge 'name', 'Issuing organization', and 'Issue date' from your Institute of Coding badge view page.
Note: If the Issuing institution has a LinkedIn account, you will see them appear in the dropdown menu as you type.
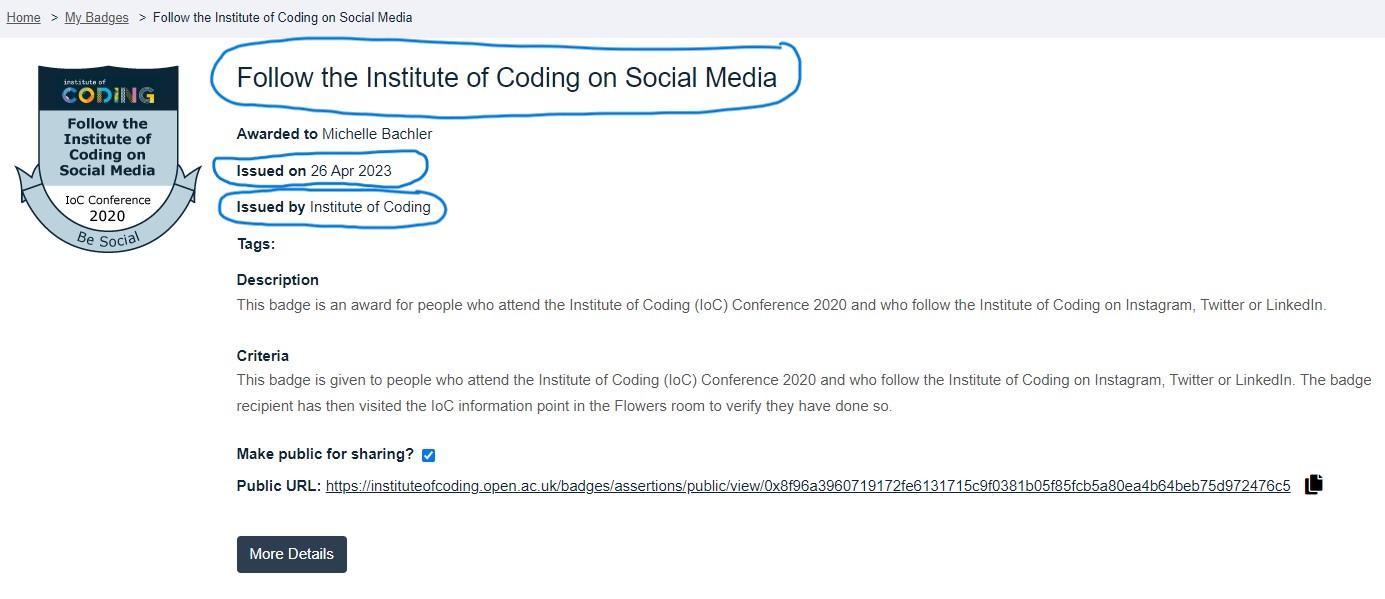
Figure 13 – An example of a Recipient Badge View page, with name date and issuer circled.
Note: You will NOT need to complete the 'Expiration date' or the 'Credential ID' parts of the form.
- Save the 'Add license or certification' form and view your badge on LinkedIn.
If you save the form and then scroll down you profile page you will eventually see the Licenses & certifications section of your profile.

Figure 14 – An example of the Licenses & certifications section of a LinkedIn Profile. - View your shared badge.
Click 'Show Credentials' on your newly added badge.

Figure 15 – An example of the Licenses & certifications section of a LinkedIn Profile with the Show Credentials button circled.
This will take you to the publically viewable badge page for your shared badge. In other words, the URL you added to the 'Credential URL' part of the form above.
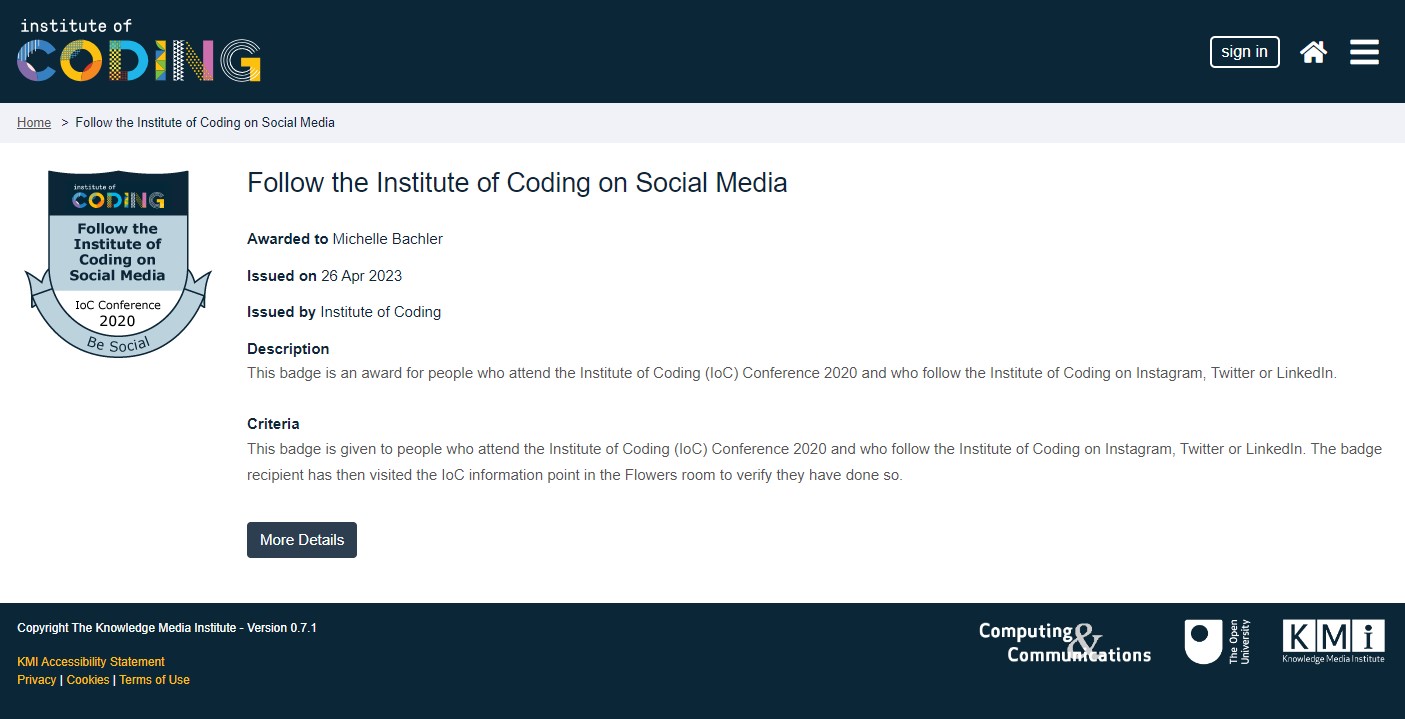
Figure 16 – An example of viewing the public badge page for a shared badge.
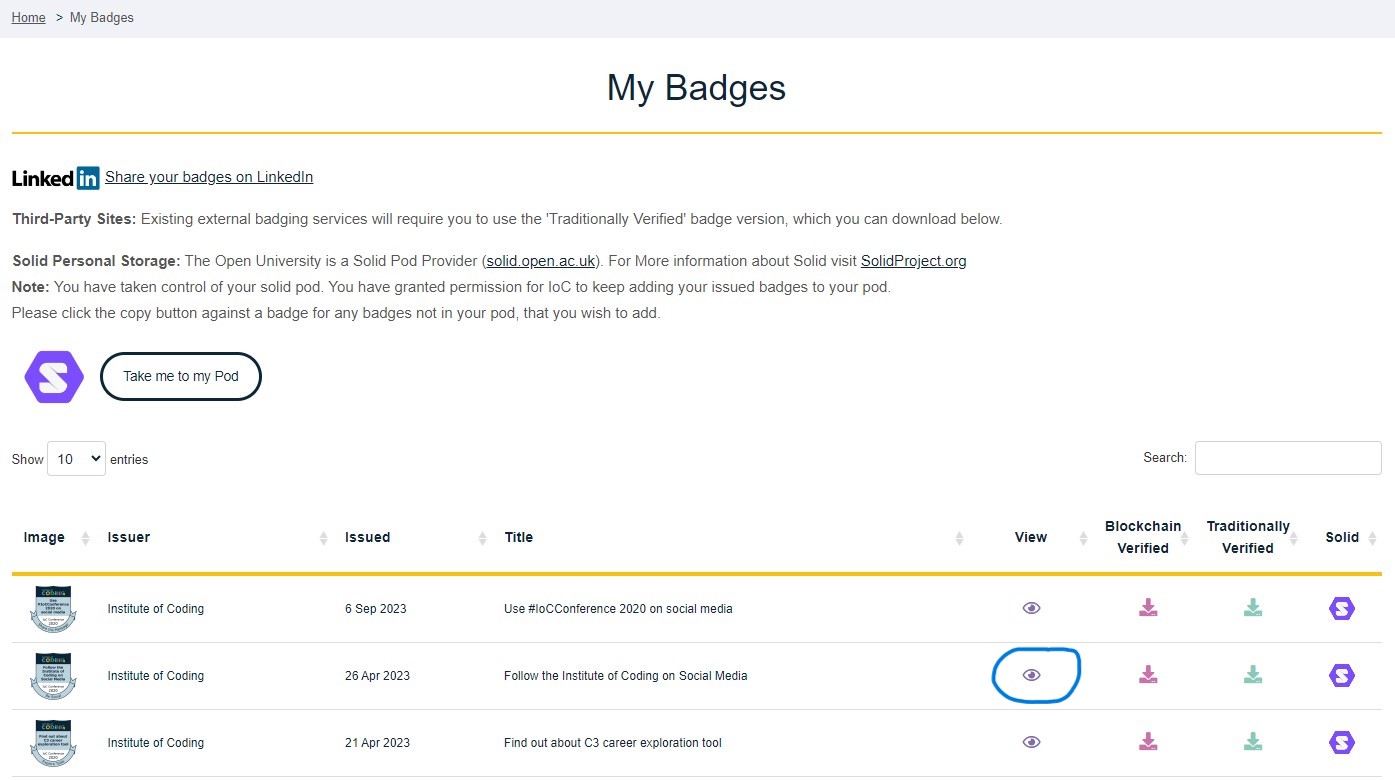
Figure 5 – Main section of the Badge Recipient homepage